
Tuckpointing · Chicagoland, IL
Mortar Matching for Tuckpointing in Chicago: Why the Right Mix Saves Your Brick
Bad tuckpointing doesn't just look wrong — the wrong mortar can crumble your brick from the inside out. Here's how a Chicago mason matches mortar type, color, and joint profile so a repair reads as original and lasts for decades. Free on-site estimates from Paul Lally's Masonry Inc.
2026-07-04
Quick Answer
Mortar matching means recreating the type, color, texture, and joint profile of a building's original mortar so a tuckpointing repair blends in and protects the brick. The critical rule: soft historic Chicago brick and greystone need a softer lime-based mortar — hard Portland mortar cracks and spalls them. Paul Lally's Masonry Inc. matches mortar right. Free on-site estimates: (708) 448-8866.
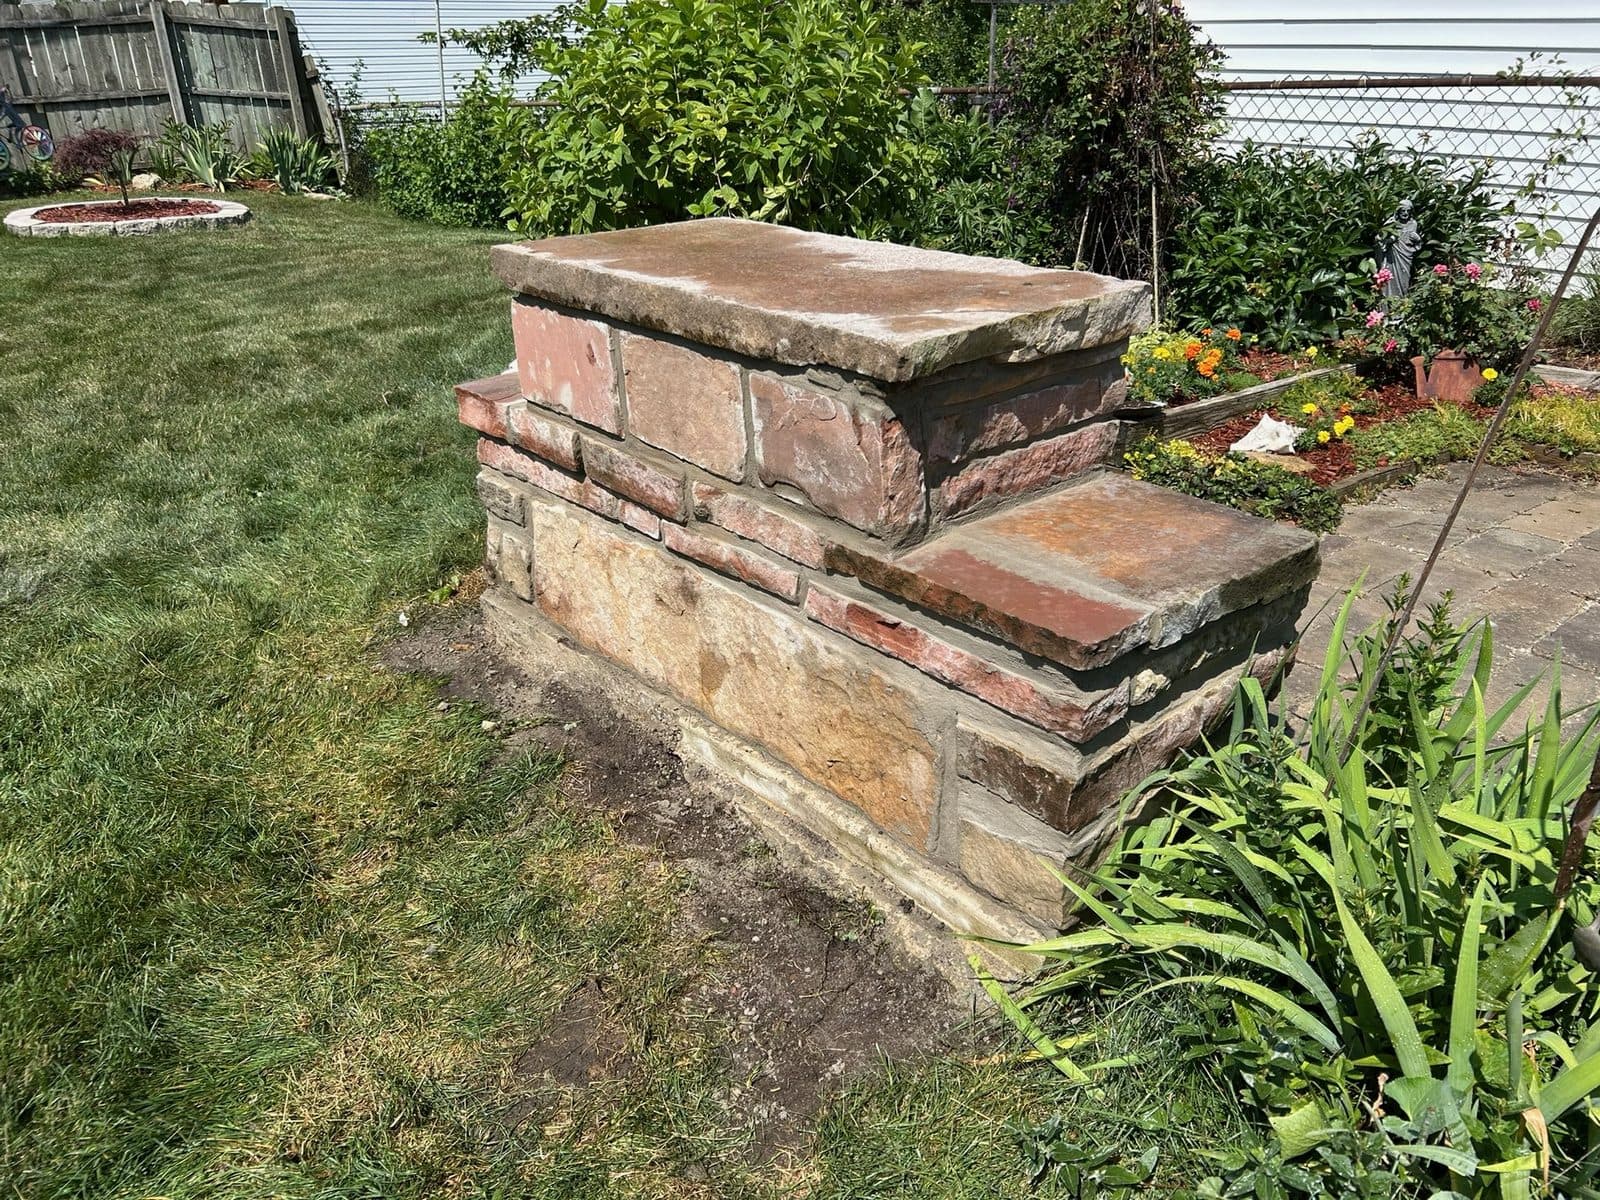
If you've noticed sandy grit at the base of your wall, gaps where the mortar used to be, or a past repair that stands out like a stripe, the fix is tuckpointing — but the part that actually protects your house is mortar matching. Matching means recreating the original mortar's hardness, color, sand, and joint shape so the new work both blends in and behaves the same way the brick was built to. Get the match right and the repair disappears and lasts decades. Get it wrong — especially on soft old Chicago brick — and a "repair" can crack and spall the very brick it was meant to save.
I've walked a lot of Chicagoland homeowners around their houses since 1988, pointing at joints and explaining what's really going on behind them. This is that walk, written down. No pricing games, no upsell — just the why.
What Mortar Actually Is (and What the Joint Does)
Mortar is a simple recipe: a binder, sand, and water. The binder — lime, Portland cement, or a blend — is the glue. The sand is the body that gives the mix bulk, color, and texture. Water kicks off the chemistry that lets it cure into a solid.
Here's the part most people miss: the mortar joint carries the weather, not just the look. Brick and mortar move — they expand in July heat, contract in January cold, and shift a hair as the building settles. The joint is designed to be the softer, more forgiving material that absorbs that movement and takes the wear so the brick doesn't have to. The joint is also the first line of defense against water. Good joints shed rain and let the wall breathe out any moisture it picks up. When joints deteriorate — you'll see crumbling mortar, deteriorating mortar joints, open gaps, or that telltale sand at the foundation — water gets in behind the brick. In Chicago, water that gets in then freezes, and freezing water is what pops brick faces off.
So the joint isn't cosmetic. It's the working part of the wall. That's why tuckpointing — grinding out failed mortar and packing in fresh — is real repair, not just a facelift. And it's why the mortar you pack back in has to be the right mortar.
Why Mortar Type Matters: Type N, Type S, and Lime
Not all mortar is the same strength, and stronger is not better. This is the single most important idea in this whole article, so I'll say it plainly:
The mortar must be softer than the brick around it.
The joint is supposed to be the sacrificial, flexible part of the wall. If the mortar is harder than the brick, the physics flip: instead of the joint absorbing movement and moisture, the brick takes the stress. Soft brick against a rigid, high-Portland mortar has nowhere to go, so its face cracks, flakes, and blows out — that's spalling brick. A homeowner who "upgraded" to a hard modern mortar on a century-old wall often ends up replacing brick a few winters later. The mortar outlived the brick, which is exactly backwards.
Here's how the common mortar types stack up:
| Mortar Type | Relative Hardness / Strength | Typical Binder | Best For |
|---|---|---|---|
| Lime mortar (or lime-rich) | Softest, most flexible, breathable | Lime, little to no Portland | Soft historic brick, greystone, century-old bungalows and two-flats |
| Type O | Soft, low strength | Lime-heavy blend | Interior and low-load historic work; some soft-brick repointing |
| Type N | Medium — the general-purpose choice | Balanced lime + Portland | Above-grade exterior walls, chimneys, most standard residential brick |
| Type S | Hard, high strength | Higher Portland content | Below-grade, load-bearing, foundations, high-stress structural masonry |
| Type M | Hardest | Highest Portland content | Heavy structural / below-grade only — too hard for most brick faces |
The practical takeaway for Chicago homes:
- Soft historic brick and greystone were laid with soft lime-based mortar. They need a lime or lime-rich mix — using hard Type S mortar or straight Portland cement mortar on them is a mistake that spalls the brick.
- Later, harder brick (common on mid-century and newer builds) is usually fine with Type N mortar for above-grade walls.
- Type S has its place — foundations, below-grade, structural — but it does not belong on a soft-brick facade.
You can't eyeball this from the sidewalk. Matching the strength means testing the existing mortar and reading the brick, which is why a real look at the wall matters more than a formula.
Color and Texture: Why a Mismatched Repair Screams
Even with the right strength, a repair can still stand out badly if the color and texture are off. Three things control how a joint reads:
- Sand. Sand is the biggest driver of mortar color and grain. Chicago-era mortars used local sands with their own color and coarseness. Match the sand and you're most of the way to an invisible repair; use a generic bag sand and the new joints often turn out too gray, too bright, or too smooth.
- Pigment. Some mortars carry a natural or added tint — buff, brown, even reddish. A small amount of mortar pigment dials the color in. Skip it and a repair on a warm-toned wall reads as a cold gray stripe.
- Joint profile. This is the shape the finished joint is tooled into, and it changes both looks and shedding of water:
- Concave joint — pressed into a smooth cupped groove; the most common and the best at shedding rain. This is what most Chicago homes want.
- Weathered joint — angled so the top is recessed and the bottom sits proud, cut to throw water off the wall.
- Flush, raked, and grapevine profiles show up on specific styles and eras.
A repair also has to reckon with weathering. Original joints have decades of soot, sun, and rain on them; brand-new mortar is cleaner and brighter no matter how well it's matched. A good mason mixes to the aged target, not the fresh one, so the repair settles in rather than glowing. Nail the sand, pigment, and profile and a stranger can't tell where the old work stops and the new begins. Miss any one of them and the eye goes straight to it.
How Pros Match and Tuckpoint — Step by Step
Here's the actual sequence behind a repair that lasts and disappears:
- Assess the brick and existing mortar. Read the brick hardness and test or examine the old mortar so the new mix matches strength — soft brick gets soft, lime-based mortar, never a hard one.
- Grind or rake the joints to depth. Cut out the failed mortar joints cleanly, typically back to about twice the joint width (often around three-quarters of an inch), without chipping the brick edges. Shallow surface smears fail fast; real depth lets the new mortar grab and bond.
- Sample and match the color. Match sand, pigment, and grain to the original — and to its weathered state, not its fresh one. On tricky historic brick, this means test batches and dry samples on the wall before committing.
- Mix to the right recipe. Blend binder, matched sand, pigment, and water to the correct mortar type and a workable, consistent batch.
- Pack the joints fully. Press mortar firmly into the raked joints in layers so there are no voids — voids are where water hides and freeze-thaw does its damage.
- Tool the profile. Strike the joints to the matching profile (usually concave in Chicago) at the right moment as the mortar firms up. Tooling compacts the surface, sheds water, and sets the final look.
- Cure it properly. Fresh mortar needs to cure slowly, not flash-dry. In hot or windy weather that can mean misting or shading the work so it gains strength instead of cracking.
Every step feeds the next. Skip the depth and the mortar pops off; skip the color match and it stands out; skip proper curing and it's weak from day one.
What Drives the Cost (and Why Every Job Is Different)
I don't quote prices in an article, because an honest number comes from seeing the wall. But I'll tell you exactly what moves the effort up or down so there are no surprises:
- Scope — how many linear feet of joint, and how far the deterioration has spread. A little crumbling mortar at a corner is a different job than a whole failing facade.
- Height and access — ground-level work is straightforward; upper stories, chimneys, and tight side yards may need scaffolding or lifts, which adds setup and safety time.
- Matching difficulty — a standard modern brick with common mortar matches quickly. Historic brick, greystone, and unusual mortar color matching or custom sand matching take test batches and skilled hands.
- Condition of the brick itself — if grinding reveals spalling brick or units that need brick repair and replacement, that's more work than joints alone.
- Profile and detail — decorative joint profiles and ornamental masonry take longer to tool and match.
That's why Paul Lally's Masonry Inc. gives a free on-site estimate — we look at your actual brick, mortar, and access, then tell you the real scope. No guessing, no phone quotes on work we haven't seen.
DIY vs. Hiring a Pro
Small, ground-level repointing on a modern brick shed? A careful, patient homeowner can learn it. But here's the honest risk on anything older or higher:
- Wrong mortar ruins brick. The most common DIY mistake is grabbing a hard, high-Portland bag mix and packing it into soft historic joints. It looks fine for a season, then the soft brick starts to spall — and now you're paying to replace brick, not just repoint it.
- Bad matching is forever. Off-color, over-smooth, or wrong-profile joints don't blend, and you can't un-see them. Fixing a bad repair usually means grinding it back out.
- Prep is the hard part. Grinding to depth without chipping brick, packing without voids, and tooling at the right moment are learned skills.
- Height is a safety issue. Chimneys and upper stories mean working off scaffolding — not a weekend risk worth taking.
The rule of thumb I give people: if the brick is soft, historic, or above the first floor, or if the color has to match visible work, bring in a pro. The cost of doing it right once is almost always less than the cost of undoing it wrong.
The Chicago and Chicagoland Context
This all matters more here than in most of the country, because of what we build with and the climate we build in.
Chicago and the suburbs are full of century-old bungalows, greystones, and two-flats — masonry stock that was laid with soft, lime-based mortar and, often, soft brick. That's exactly the material that a hard modern mortar destroys. When someone repoints a Berwyn bungalow or a South Side greystone with rigid Type S, the damage shows up within a few winters.
And our winters are the stress test. Freeze-thaw cycling — water soaking into a joint, freezing, expanding, thawing, over and over — is the number-one destroyer of Chicago masonry. Add lake-effect moisture off Lake Michigan and wind-driven rain, and any open or failed joint becomes a water entry point that freeze-thaw pries wider every cold snap. Well-matched, well-tooled joints that shed water and let the wall breathe are what keep that cycle from taking your brick apart. Matching mortar right isn't a detail here — it's how a Chicago wall survives the climate it lives in.
Maintenance and Prevention
Once your tuckpointing is done right, keeping it that way is mostly about controlling water:
- Walk your walls once a year. Look for deteriorating mortar joints, hairline gaps, or sand collecting at the base. Small repairs stay small when you catch them early.
- Keep water moving away. Clean gutters, working downspouts, and proper grading keep sheets of water off the brick.
- Watch the usual trouble spots. Chimneys, parapets, sills, and the weather-facing side of the house get the most exposure and fail first.
- Know what efflorescence and spalling mean. White powdery efflorescence is salt left behind by moisture moving through the wall — a sign water is getting in. Flaking, popped brick faces mean freeze-thaw is already at work. Both are cues to have the wall looked at.
- Be careful with sealers. A breathable brick sealing product can help on exposed walls, but old brick has to breathe. The wrong sealer traps moisture inside and causes the exact spalling you were trying to prevent — so brick sealing is a case-by-case call, made after fresh mortar has fully cured.
Related Services
- Tuckpointing & repointing — grinding out failed joints and repacking with matched mortar, done right for your brick.
- Brick repair — replacing spalled, cracked, or missing brick and blending repairs into the existing wall.
- Masonry restoration — bringing historic bungalows, greystones, and two-flats back to sound, weather-tight condition.
Frequently Asked Questions
What does mortar matching mean in tuckpointing? It's recreating the original mortar's hardness, color, sand, and joint profile so a repair blends in and behaves the same way the wall was built to. It covers both how the mortar looks and how strong it is. A good match protects the brick and reads as original.
Why does the type of mortar matter so much? Mortar must be softer than the brick around it so the joint — not the brick — absorbs building movement and moisture. A hard mortar on soft brick traps stress in the brick face and causes it to crack and spall. Matching strength to the brick matters more than raw strength.
What mortar is right for old Chicago brick and greystone? Most were laid with soft lime-based mortar, so a lime or lime-rich mix is usually the correct match. A hard Type S or straight Portland mortar is too rigid and damages the soft brick over time. The right recipe comes from testing the existing mortar and brick.
Why does my old tuckpointing look like a different color? Color comes from the sand and any pigment, and both weather over time. A repair that used the wrong sand or skipped pigment matching shows up as bright or gray stripes. Matching sand, pigment, and joint profile is what makes a repair disappear.
Can I tuckpoint my own brick house? You can, but the risk is high — wrong mortar type or poor joint prep can permanently damage the brick and is expensive to undo. Matching soft historic mortar and tooling clean joints takes experience and the right tools. For anything historic or above ground level, a pro is safer.
How deep do mortar joints need to be ground out? Generally back to about twice the joint width — commonly around three-quarters of an inch — so the new mortar has depth to bond. Shallow surface smears pop off within a season or two. Clean depth and a clean brick edge are what make repointing last.
Should I seal my brick after tuckpointing? Sometimes — a breathable sealer can help on exposed walls, but old brick needs to breathe, so the wrong sealer traps moisture and causes spalling. Fresh mortar also needs to cure fully first. It's a case-by-case decision best made on-site.
The Bottom Line
Tuckpointing is only as good as the mortar you pack back in. Match the strength to the brick, match the sand and pigment to the wall's aged color, tool the right joint profile, and cure it properly — and you get a repair that disappears and protects your home through decades of Chicago winters. Miss the match and, at best, you get an ugly stripe; at worst, you spall the very brick you were trying to save. On soft historic brick, greystone, and old bungalows and two-flats, that difference is everything.
Paul Lally's Masonry Inc. is a family-owned, insured masonry contractor serving Chicago and the Chicagoland suburbs since 1988 — tuckpointing, brick repair and replacement, chimney repair and rebuilds, lintel replacement, masonry restoration, and waterproofing for residential and commercial properties. Built on Craftsmanship. Backed by Experience. Free on-site estimates — call (708) 448-8866.
If your joints are crumbling, your brick is spalling, or a past repair never looked right, let's take a look at the actual wall. Get your free on-site estimate or call (708) 448-8866 — and we'll tell you honestly what your brick needs.
Frequently Asked Questions
What does mortar matching mean in tuckpointing?
Mortar matching is recreating the original mortar's hardness, color, sand, and joint profile so a repair blends in and behaves the same way. It covers both how the mortar looks and how strong it is. A good match protects the brick and reads as original.
Why does the type of mortar matter so much?
Mortar has to be softer than the brick around it so the joint — not the brick — absorbs building movement and moisture. Using a hard Portland mortar on soft historic brick traps stress in the brick face, causing it to crack and spall. Matching the strength to the brick is more important than raw strength.
What mortar is right for old Chicago brick and greystone?
Most century-old Chicago brick and greystone were laid with soft lime-based mortar, so a lime or lime-rich mix is usually the correct match. A hard modern Type S or straight Portland mortar is too rigid and will damage the soft brick over time. The right call comes from testing the existing mortar and brick.
Why does my old tuckpointing look like a different color?
Color comes from the sand and any pigment in the mix, and both weather over time. If a repair used the wrong sand or skipped pigment matching, the new joints stand out as bright or gray stripes. Matching sand, pigment, and joint profile is what makes a repair disappear.
Can I tuckpoint my own brick house?
You can, but the risk is high: wrong mortar type or poor joint prep can permanently damage the brick and is expensive to undo. Matching soft historic mortar and tooling clean joints takes experience and the right tools. For anything historic or above ground level, a pro is the safer choice.
How deep do mortar joints need to be ground out for tuckpointing?
As a rule, joints are raked or ground back to roughly twice their width — commonly around three-quarters of an inch — to give the new mortar enough depth to bond. Shallow smears over the surface pop off within a season or two. Clean depth and a clean brick edge are what make repointing last.
What makes tuckpointing cost more on some houses than others?
Scope, wall height and access, and how hard the mortar is to match all drive cost. Historic brick that needs custom color and sand matching, plus scaffolding for upper stories or chimneys, takes more time and skill. Paul Lally's Masonry Inc. gives a free on-site estimate so you know the scope before any work begins.
How long does good tuckpointing last in Chicago?
Properly matched and tooled joints commonly last 25 years or more, even through Chicago freeze-thaw cycles. Lifespan depends on the mortar match, joint prep, and keeping water off the wall. Poor matching or wrong mortar can fail in just a few seasons.
Should I seal my brick after tuckpointing?
Sometimes — a breathable sealer can help on exposed or weathered walls, but old brick needs to breathe, so the wrong sealer traps moisture and causes spalling. Fresh mortar also needs to cure fully first. It's a case-by-case decision best made on-site.